Nacos服务注册和发现
依赖
Nacos服务注册和发现的依赖
1
2
3
4
5
| <dependency>
<groupId>org.springframework.cloud</groupId>
<artifactId>spring-cloud-starter-alibaba-nacos-discovery</artifactId>
<version>0.9.0.RELEASE</version>
</dependency>
|
项目结构
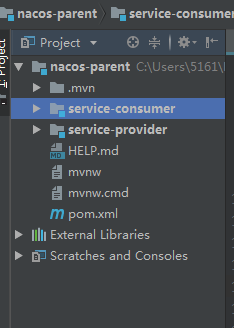
本示例的项目结构如下:
服务提供者
服务提供方:是指提供可复用和可调用服务的应用方
使用Idea 的SpringBoot项目引导器创建SpringBoot项目
导入依赖
1
2
3
4
5
6
7
8
9
10
11
12
13
14
15
16
17
18
| <dependencies>
<dependency>
  <groupId>org.springframework.cloud</groupId>
  <artifactId>spring-cloud-starter-alibaba-nacos-discovery</artifactId>
  <version>0.9.0.RELEASE</version>
</dependency>
<dependency>
<groupId>org.springframework.boot</groupId>
<artifactId>spring-boot-starter-web</artifactId>
</dependency>
<dependency>
<groupId>org.springframework.boot</groupId>
<artifactId>spring-boot-starter-test</artifactId>
<scope>test</scope>
</dependency>
</dependencies>
|
编写测试Controller
1
2
3
4
5
6
7
8
9
10
11
12
13
14
15
16
| @SpringBootApplication
@EnableDiscoveryClient
public class ServiceProviderApplication {
public static void main(String[] args) {
SpringApplication.run(ServiceProviderApplication.class, args);
}
@RestController
class EchoController {
@RequestMapping(value = "/echo/{string}", method = RequestMethod.GET)
public String echo(@PathVariable String string) {
return "Hello Nacos Discovery " + string;
}
}
}
|
注意:使用@EnableDiscoveryClient 注解来启用服务注册发现机制。
配置properties
1
2
3
| server.port= 8070
spring.application.name= service-provider
spring.cloud.nacos.discovery.server-addr= 127.0.0.1:8848
|
服务消费者
服务消费者:是指会发起对某个服务调用的应用方
导入依赖
这里没有什么不同,与服务提供者是一样的。
1
2
3
4
5
6
7
8
9
10
11
12
13
14
15
16
| <dependencies>
<dependency>
<groupId>org.springframework.cloud</groupId>
<artifactId>spring-cloud-starter-alibaba-nacos-discovery</artifactId>
<version>0.9.0.RELEASE</version>
</dependency>
<dependency>
<groupId>org.springframework.boot</groupId>
<artifactId>spring-boot-starter-web</artifactId>
</dependency>
<dependency>
<groupId>org.springframework.boot</groupId>
<artifactId>spring-boot-starter-test</artifactId>
<scope>test</scope>
</dependency>
</dependencies>
|
编写消费服务示例
1
2
3
4
5
6
7
8
9
10
11
12
13
14
15
16
17
18
19
20
21
22
23
24
25
26
27
28
29
30
31
32
33
34
35
36
37
38
39
40
41
42
| package com.ooyhao.serviceconsumer;
import org.springframework.beans.factory.annotation.Autowired;
import org.springframework.boot.SpringApplication;
import org.springframework.boot.autoconfigure.SpringBootApplication;
import org.springframework.cloud.client.discovery.EnableDiscoveryClient;
import org.springframework.cloud.client.loadbalancer.LoadBalanced;
import org.springframework.context.annotation.Bean;
import org.springframework.web.bind.annotation.PathVariable;
import org.springframework.web.bind.annotation.RequestMapping;
import org.springframework.web.bind.annotation.RequestMethod;
import org.springframework.web.bind.annotation.RestController;
import org.springframework.web.client.RestTemplate;
@SpringBootApplication
@EnableDiscoveryClient
public class ServiceConsumerApplication {
public static void main(String[] args) {
SpringApplication.run(ServiceConsumerApplication.class, args);
}
@LoadBalanced
@Bean
public RestTemplate restTemplate() {
return new RestTemplate();
}
@RestController
public class TestController {
private final RestTemplate restTemplate;
@Autowired
public TestController(RestTemplate restTemplate) {this.restTemplate = restTemplate;}
@RequestMapping(value = "/echo/{str}", method = RequestMethod.GET)
public String echo(@PathVariable String str) {
return restTemplate.getForObject("http://service-provider/echo/" + str, String.class);
}
}
}
|
这里使用RestTemplate进行调用,可以看出,此时这里可以看到使用的是服务名称 service-provider . 而不是使用IP地址。这也是服务注册中心的存在的重要意义,我们不需要知道服务提供方的IP地址,而只需要知道服务名,将IP地址和服务名的映射关系交给注册中心去动态维护,这样,如果同一个服务的IP地址变了,我们也不需要修改服务器消费者。
配置properties
1
2
3
| server.port=8080
spring.application.name= service-consumer
spring.cloud.nacos.discovery.server-addr=127.0.0.1:8848
|
启动服务提供者和消费者项目。
我们可以使用spring.cloud.nacos.discovery.enabled=false 来禁用。
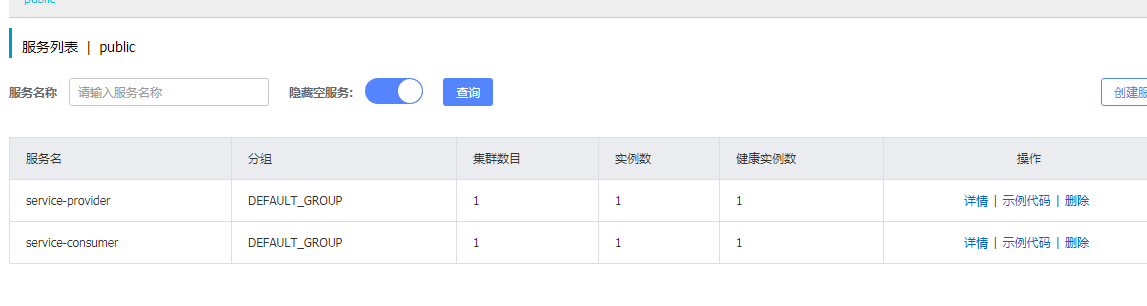
查询服务列表
此时我们再查询服务列表,如图所示,服务提供者和服务消费者已经成功注册到服务注册中心了。
测试服务调用
访问localhost:8080/echo/HelloNacos,结果如下:

此时,简单的服务注册和发现已经测试成功了。So Easy 有不有!
更多配置信息
https://spring-cloud-alibaba-group.github.io/github-pages/greenwich/spring-cloud-alibaba.html#_more_information_about_nacos_discovery_starter_configurations
