连接sentinel控制台并实现限流
连接sentinel控制台
我们这里依赖之前
依赖
1 | <dependency> |
配置文件
1 | spring: |
说明:
spring.cloud.sentinel.transport.dashboard来配置连接sentinel控制台的 ip:port;port: 默认是8719,这是端口是配置与sentinel dashboard来实时通信端口;server.port: 是当前项目的端口。
Controller
我们先简单编写一个测试的controller,来测试连接sentinel控制台的效果:
1 |
|
下面我们通过在控制台使用curl命令或是在浏览器访问几次 http://localhost:8081/hello 。

1 | curl http://localhost:8081/hello |
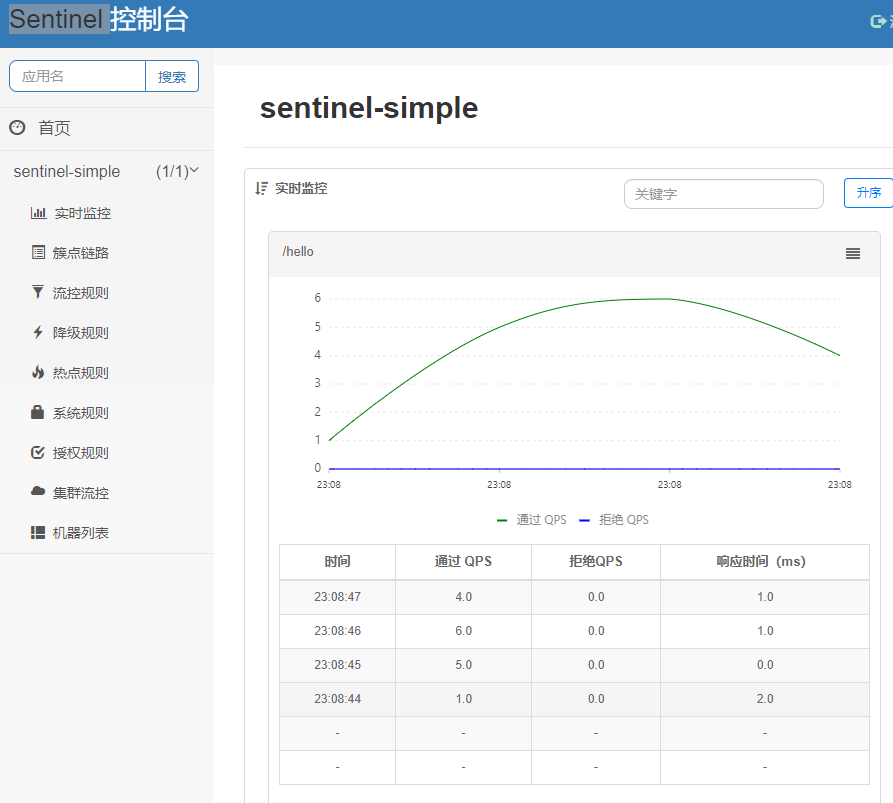
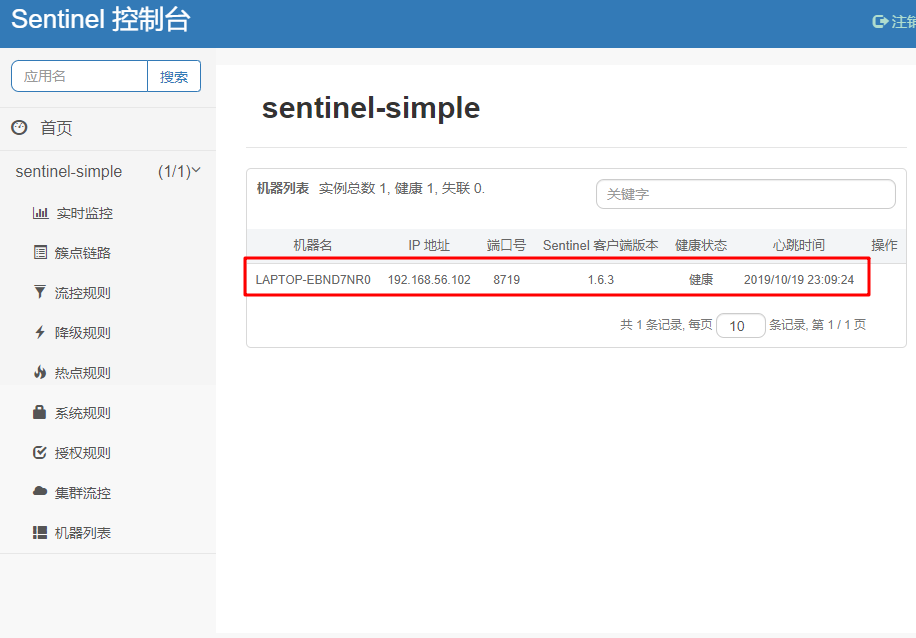
sentinel控制台效果
实时监控:
机器列表:
限流配置
下面我们利用sentinel 的dashboard管理页面来配置流控规则:
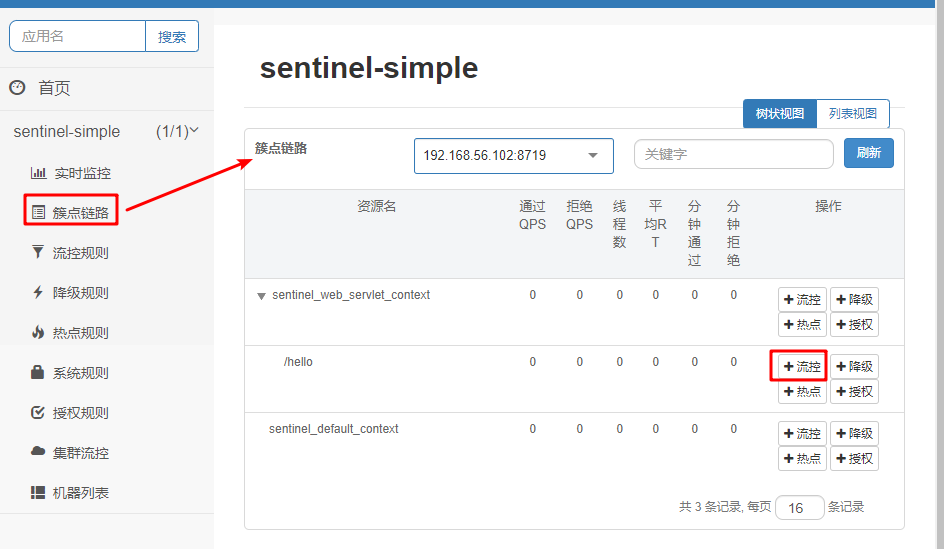
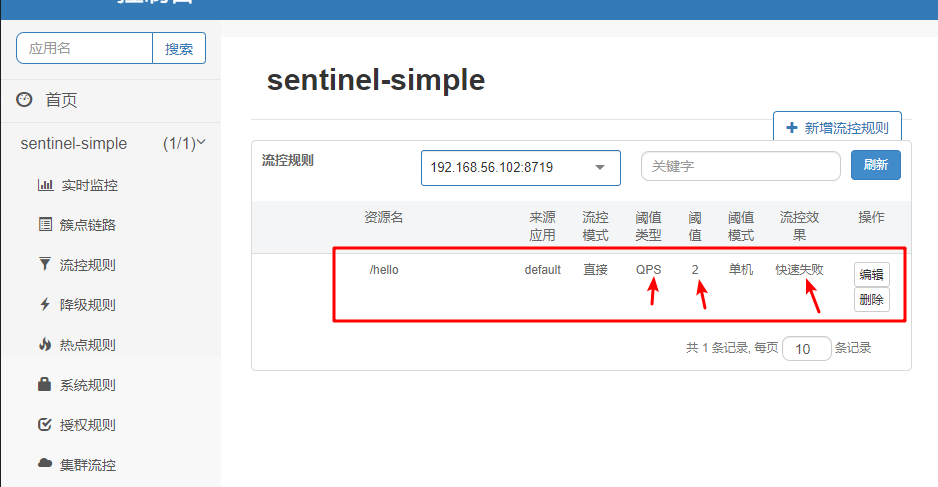
我们点击簇点链路菜单,选择我们当前的/hello 接口的流控 按钮,配置相应的流控规则:
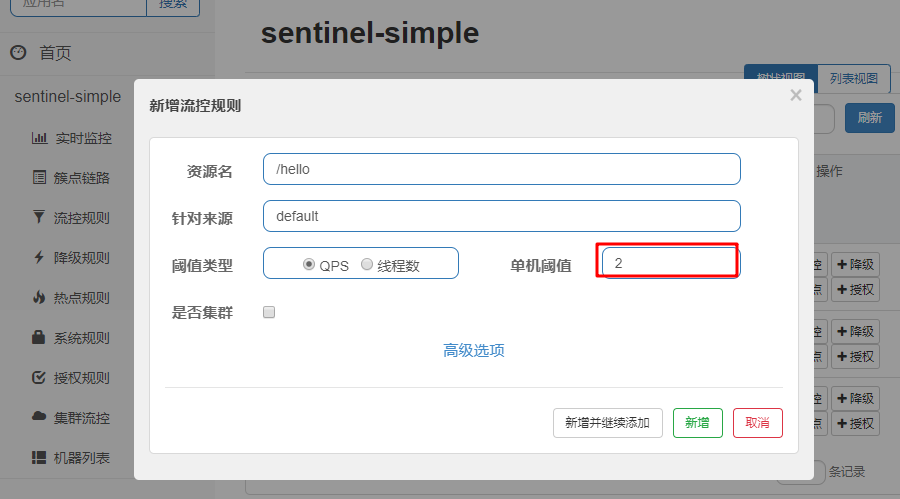
我们通过流控规则添加页面添加一条针对/hello 的流控规则.
- 阈值类型:
- 线程数:顾名思义就是当前接口的并发数。
- QPS:Queries Per Second,中文就是,每秒查询数。
当前我们将单机阈值的值设置为2.下面我们测试一下:

我们通过测试可以发现,当我们快速的访问接口时,在一秒之内的第三次访问会自动被sentinel限制,返回默认值Blocked by Sentinel (flow limiting) .我们可以再看一下流控规则 的页面: