这里我们先介绍一下如何整合Redis,后面再整合一个SSM+redis的项目,无spring配置文件。
SpringDataRedis
SpringDataRedis提供了两个模板:
- RedisTemplate
- StringRedisTemplate
RedisTemplate 的很多功能是以子API的形式提供的,他们区分了单个值和集合值的场景;
| 方法 |
子API接口 |
描述 |
| opsForValue() |
ValueOperations<K,V> |
操作具有简单值得条目 |
| opsForList() |
ListOperations<K,V> |
操作具有list的值的条目 |
| opsForSet() |
SetOperations<K,V> |
操作具有set的值的条目 |
| opsForZSet() |
ZSetOperations<K,V> |
操作具有ZSet值(排序的set)的条目 |
| opsForHash() |
HashOperations<K,V> |
操作具有hash的条目 |
| boundValueOps(K) |
BoundValueOperations<K,V> |
以绑定指定key的方式,操作具有简单值的条目 |
| boundListOps(K) |
BoundListOperations<K,V> |
以绑定指定key的方式,操作具有List值的条目 |
| boundSetOps(K) |
BoundSetOperations<K,V> |
以绑定指定key的方式,操作具有Set值的条目 |
| boundZSetOps(K) |
BoundZSetOperations<K,V> |
以绑定指定key的方式,操作具有ZSet值(排序的Set)的条目 |
| boundHashOps(K) |
BoundHashOperations<K,V> |
以绑定指定key的方式,操作具有Hash值的条目 |
使用key和value的序列化器
当某个条目保存到Redis key-value存储的时候,key和value都会使用Redis的序列化器(Serializer)进行序列化。SpringDataRedis提供了多个这样的序列化器,包括:
- GenericToStringSerializer:使用Spring转换服务进行序列化;
- JacksonJsonRedisSerializer:使用Jackson1,将对象序列化为JSON;
- Jackson2JsonRedisSerializer:使用Jackson2,将对象序列化为JSON;
- JdkSerializationRedisSerializer:使用Java序列化;
- OxmSerializer:使用Spring O/X映射的编排器和解排器(marshaler和unmarshaler)实现序列化,用于XML序列化。
- StringRedisSerializer:序列化String类型的key和value。
这些序列化器都实现了RedisSerializer接口,如果其中没有符合需求的序列化器,那么可以自行创建。
下面看一个列子:
例如:假设当使用RedisTemplate的时候,我们希望将Product类型的value序列化为json,而key是String类型。RedisTemplate的setKeySerializer()和setValueSerializer()方法就需要如下所示了:
1
2
3
4
5
6
7
8
| @Bean
public RedisTemplate<String,Product> redisTemplate(RedisConnectionFactory cf){
RedisTemplate<String,Product> redis = new RedisTemplate<String,Product>();
redis.setConnectionFactory(cf);
redis.setKeySerializer(new StringRedisSerializer());
redis.setValueSerializer(new Jackson2JsonRedisSerializer<Product>(Product.class))
return redis;
}
|
在这里,我们设置RedisTemplate在序列化key的时候,使用StringRedisSerializer,并且设置了在序列化Product的时候,使用的是Jackson2JsonRedisSerializer。
项目整合
项目结构
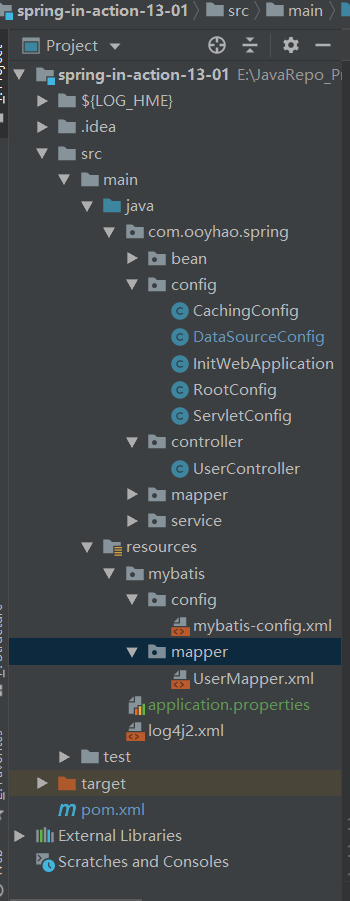
InitWebApplication
1
2
3
4
5
6
7
8
9
10
11
12
13
14
15
16
17
18
19
20
21
22
23
24
25
26
27
28
29
30
31
32
33
34
35
36
37
| public class InitWebApplication extends AbstractAnnotationConfigDispatcherServletInitializer {
@Override
protected Class<?>[] getRootConfigClasses() {
return new Class[]{
RootConfig.class
};
}
@Override
protected Class<?>[] getServletConfigClasses() {
return new Class[]{
ServletConfig.class
};
}
@Override
protected String[] getServletMappings() {
return new String[]{
"/"
};
}
@Override
protected Filter[] getServletFilters() {
CharacterEncodingFilter filter = new CharacterEncodingFilter();
filter.setForceEncoding(true);
filter.setEncoding("utf-8");
return new Filter[]{
filter
};
}
}
|
这个文件的作用主要是替代了原有传统web项目中web.xml文件的角色
RootConfig
RootConfig 则替代了原有的applicationContext.xml文件
1
2
3
4
5
6
7
8
9
10
11
12
13
14
15
| package com.ooyhao.spring.config;
import org.springframework.context.annotation.ComponentScan;
import org.springframework.context.annotation.Configuration;
@Configuration
@ComponentScan(basePackages = "com.ooyhao.spring")
public class RootConfig {}
|
ServletCofig.xml
1
2
3
4
5
6
7
8
9
10
11
12
| @Configuration
@EnableWebMvc
@ComponentScan(basePackages = "com.ooyhao.spring.controller")
public class ServletConfig implements WebMvcConfigurer {
@Override
public void configureDefaultServletHandling(
DefaultServletHandlerConfigurer configurer) {
configurer.enable();
}
}
|
DataSourceConfig
1
2
3
4
5
6
7
8
9
10
11
12
13
14
15
16
17
18
19
20
21
22
23
24
25
26
27
28
29
30
31
32
33
34
35
36
37
38
39
40
41
42
43
44
45
46
47
48
49
50
51
52
53
54
55
56
57
58
59
60
61
62
63
64
65
66
67
68
69
70
71
72
73
74
75
76
77
78
79
80
81
82
83
84
85
86
87
88
89
90
91
92
93
94
95
96
97
98
99
100
101
102
103
104
105
106
107
108
109
110
111
112
113
114
115
116
117
118
119
120
121
122
123
124
125
126
127
128
129
130
131
132
133
134
135
136
137
138
139
140
141
142
143
144
145
146
147
148
149
150
151
152
153
154
| @Configuration
@MapperScan(basePackages = "com.ooyhao.spring.mapper")
@EnableTransactionManagement
@PropertySource(value = "classpath:application.properties")
public class DataSourceConfig {
@Value("${dataSource.maxActive}")
private Integer dataSourceMaxActive;
@Value("${dataSource.maxWait}")
private Integer dataSourceMaxWait;
@Value("${dataSource.minIdle}")
private Integer dataSourceMinIdle;
@Value("${dataSource.initialSize}")
private Integer dataSourceInitialSize;
@Value("${dataSource.url}")
private String dataSourceUrl;
@Value("${dataSource.username}")
private String dataSourceUsername;
@Value("${dataSource.password}")
private String dataSourcePassword;
@Value("${dataSource.driverClassName}")
private String dataSourceDriverClassName;
@Value("${mybatis.typeAliasesPackage}")
private String mybatisTypeAliasesPackage;
@Value("${mybatis.configLocation}")
private String mybatisConfigLocation;
@Value("${mybatis.mapperLocations}")
private String mybatisMapperLocations;
@Value("${redis.maxTotal}")
private Integer redisMaxTotal;
@Value("${redis.maxWaitMillis}")
private Integer redisMaxWaitMillis;
@Value("${redis.minIdle}")
private Integer redisMinIdle;
@Value("${redis.maxIdle}")
private Integer redisMaxIdle;
@Value("${redis.hostName}")
private String redisUsername;
@Value("${redis.password}")
private String redisPassword;
@Value("${redis.port}")
private Integer redisPort;
@Bean
public DataSource dataSource(){
DruidDataSource dataSource = new DruidDataSource();
dataSource.setMaxActive(dataSourceMaxActive);
dataSource.setMaxWait(dataSourceMaxWait);
dataSource.setMinIdle(dataSourceMinIdle);
dataSource.setInitialSize(dataSourceInitialSize);
dataSource.setUrl(dataSourceUrl);
dataSource.setUsername(dataSourceUsername);
dataSource.setPassword(dataSourcePassword);
dataSource.setDriverClassName(dataSourceDriverClassName);
return dataSource;
}
@Bean
public DataSourceTransactionManager dataSourceTransactionManager(DataSource dataSource){
DataSourceTransactionManager transactionManager =
new DataSourceTransactionManager();
transactionManager.setDataSource(dataSource);
return transactionManager;
}
@Bean
public SqlSessionFactoryBean sqlSessionFactoryBean(DataSource dataSource) throws Exception {
SqlSessionFactoryBean bean = new SqlSessionFactoryBean();
bean.setDataSource(dataSource);
bean.setTypeAliasesPackage(mybatisTypeAliasesPackage);
bean.getObject().getConfiguration().setCacheEnabled(true);
bean.getObject().getConfiguration().setMapUnderscoreToCamelCase(true);
bean.getObject().getConfiguration().setLogImpl(Slf4jImpl.class);
bean.getObject().getConfiguration().setLogPrefix("###SPRING###MYBATIS###");
bean.setConfigLocation(new ClassPathResource(mybatisConfigLocation));
PathMatchingResourcePatternResolver resourcePatternResolver =
new PathMatchingResourcePatternResolver();
Resource[] resources = resourcePatternResolver.getResources(mybatisMapperLocations);
bean.setMapperLocations(resources);
return bean;
}
@Bean
public JdbcTemplate jdbcTemplate(DataSource dataSource){
return new JdbcTemplate(dataSource);
}
@Bean
public JedisClientConfiguration poolConfig() {
JedisPoolConfig config = new JedisPoolConfig();
config.setMaxTotal(20);
config.setMaxWaitMillis(3000);
config.setMinIdle(5);
config.setMaxIdle(8);
JedisClientConfiguration.JedisPoolingClientConfigurationBuilder
builder= (JedisClientConfiguration.JedisPoolingClientConfigurationBuilder)
JedisClientConfiguration.builder();
builder.poolConfig(config);
return builder.build();
}
@Bean
public RedisStandaloneConfiguration standaloneConfiguration() {
RedisStandaloneConfiguration configuration = new RedisStandaloneConfiguration();
configuration.setHostName("120.79.167.88");
configuration.setPassword("");
configuration.setPort(6379);
return configuration;
}
@Bean
public JedisConnectionFactory connectionFactory() {
return new JedisConnectionFactory(standaloneConfiguration(),poolConfig());
}
@Bean
public RedisTemplate redisTemplate() {
RedisTemplate redisTemplate = new RedisTemplate();
redisTemplate.setConnectionFactory(connectionFactory());
redisTemplate.setKeySerializer(new StringRedisSerializer());
redisTemplate.setValueSerializer(new JdkSerializationRedisSerializer());
return redisTemplate;
}
}
|
- 开启事务管理 @EnableTransactionManagement
- 加载配置文件 @PropertySource(value = “classpath:application.properties”)
- 配置了Mybatis的数据源,使用的是alibaba的Druid数据源
- 配置了事务管理 DataSourceTransactionManager
- 整合mybatis SqlSessionFactoryBean
- 将DataSource注入到了JdbcTemplate
- 整合redis
这里需要配合配置文件application.properties.
1
2
3
4
5
6
7
8
9
10
11
12
13
14
15
16
17
18
19
20
21
22
23
|
dataSource.maxActive = 20
dataSource.maxWait = 5
dataSource.minIdle = 5
dataSource.initialSize = 5
dataSource.url = jdbc:mysql://120.79.167.88:3306/spring_in_action?useUnicode=true&characterEncoding=utf-8
dataSource.username = root
dataSource.password = root
dataSource.driverClassName = com.mysql.jdbc.Driver
mybatis.typeAliasesPackage = com.ooyhao.spring.bean
mybatis.configLocation = mybatis/config/mybatis-config.xml
mybatis.mapperLocations = mybatis/mapper/*.xml
redis.maxTotal = 20
redis.maxWaitMillis = 3000
redis.minIdle = 5
redis.maxIdle = 8
redis.hostName = 120.79.167.88
redis.password =
redis.port = 6379
|
mybatis-config.xml
1
2
3
4
5
6
7
8
9
10
11
12
13
14
15
16
17
18
19
| <?xml version="1.0" encoding="UTF-8" ?>
<!DOCTYPE configuration
PUBLIC "-//mybatis.org//DTD Config 3.0//EN"
"http://mybatis.org/dtd/mybatis-3-config.dtd">
<configuration>
<settings>
<setting name="mapUnderscoreToCamelCase" value="true"/>
</settings>
</configuration>
|
mapUnderscoreToCamelCase 驼峰命名法在java配置中没有生效。
剩下的就是简单的Bean,dao,service,controller了。
